Even if you’re having your wedding in your home town or if you’ve found the place for the perfect destination wedding, weddings tends to be rather expensive. It’s hard to know where to cut expenses. Do I really want to have a less beautiful dress or venue? The answer is probably no.
Where you can cut expenses and no one will notice is at the dessert table. We can see how wedding cakes is constantly swished out for more modern (and less expensive) alternatives.
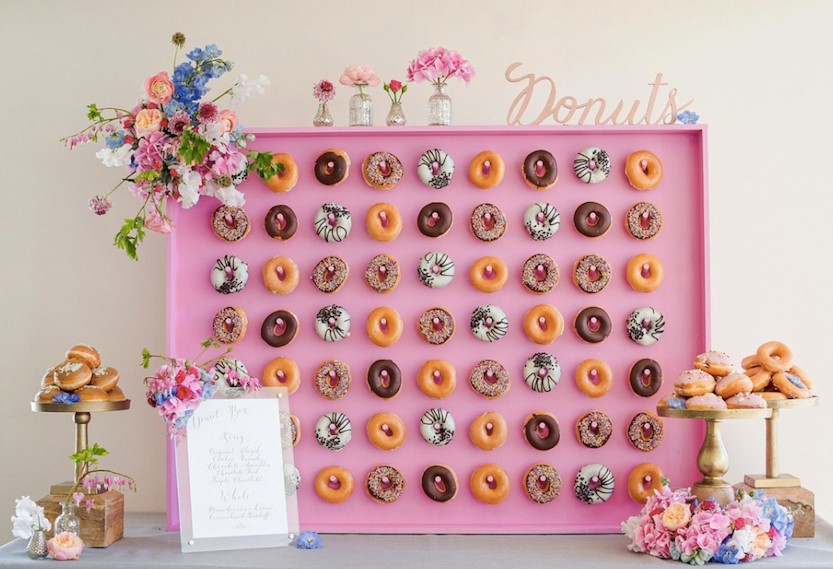
The most outstanding alternative right now is the donut wall.
We are now going to explain how you make your own donut wall in 3 easy steps.

All you need is:
- A piece of pegboard, playwood or anything else that you can use as your backdrop.
- Wood dowels that is around 10 cm. If you are using a pegboard as your backdrop make sure to buy wood dowels that fits in it’s holes.
- A saw, sandpaper, glue and paint and other decorations of your choice.
Step one: Preparation of the backdrop
When you have cut the board into wished size (it all depends on how many donuts your planning to hang on your wall), you should sandpaper the corners and over the holes to remove the sharp edges.
Make sure the backdrop in clean from any dust before painting it with the colour of your choice. Maybe you have a theme colour that your used on your invitations or maybe you’ll use the same colour as the flowers of your bouquet?
If you want your backdrop to be extra special, use an old mirror or a picture frame.

Step two: Insert the dowels to the backdrop
Measure about 15 centimetres in between every hole. If you are using playwood you’ll have to drill holes to be able to insert the wooden dowels.
Dip the end of the dowel in glue and push it about 5 cm through the board to be able to create stability for the dowel to hold up a donut.
When all the dowels are in place, let the board dry a few hours.

Step three: Decoration. Your personal touch to the donut wall
This is probably the step that you are going to enjoy the most. Now it’s time to put your personal touch to the donut wall. Here are some tips of what you can use as decoration.
Use a sign to get attention to your donut wall or maybe to share a sweet quote:


Use paper doilies to spice up the backdrop:

Make your wall into letter and share a message of love:

There are infinite ideas of how to decorate your donut wall. Let us know how you are going to decorate your donut wall in the comment section below!
Everything is very open with a precise explanation of the challenges.
It was definitely informative. Your website is very helpful.
Many thanks for sharing!
What’s up, after reading this amazing piece of writing
i am as well happy to share my experience here with
mates.
I hope that you won’t stop writing such interesting articles. I’m waiting for more of your content. I’m going to follow you.
Amazing blog post and brilliant wedding tips thanks for sharing.
Hey, I read your article and your information are such great and amazing it is so much helpful for me. keep it up and your information is very impressive. Thank you so much:)